This tutorial explains how to publish and deploy a web application to IIS.
Important: you must have a domain mapped to the web server instance that hosts your web application in order to deploy to IIS. Follow these instructions to map an AWS EC2 instance to a GoDaddy domain.
Preliminary Operations
There are two main methods to deploy a web application to IIS: manually (copy/paste the site files) and remotely using Web Deploy (preferred method). This tutorial will explain how to deploy your web app from your developer machine to IIS installed in your web server. Before doing this, there are some preliminary operations.
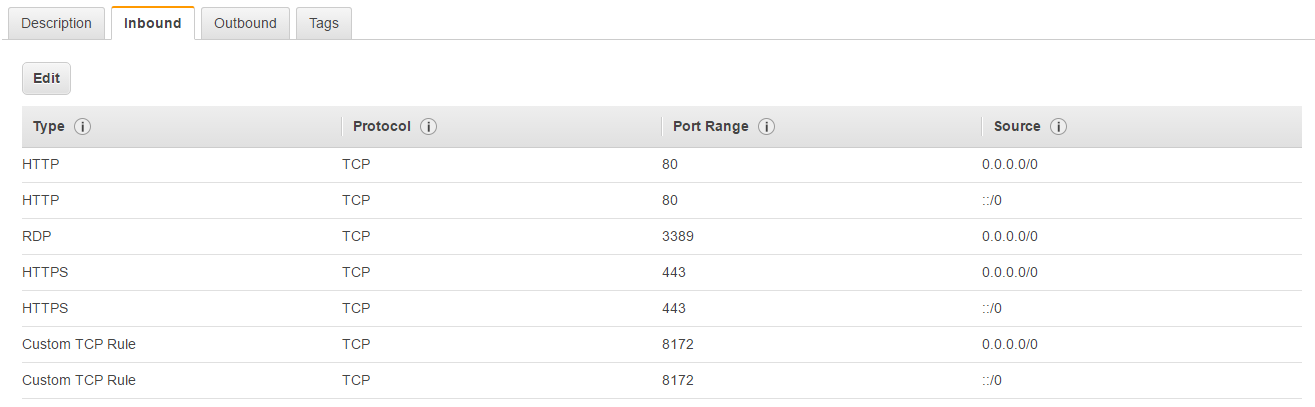
Web Deploy uses TCP on port 8172 to deploy the web application, so we need to enable this in the security group in AWS
- Open the AWS EC2 Management Console
- Go to the security group page of your EC2 instance, and add an inbound Custom TCP Rule with port 8172, with Source set to “Anywhere” (or “0.0.0.0/0” and “::/0”).<
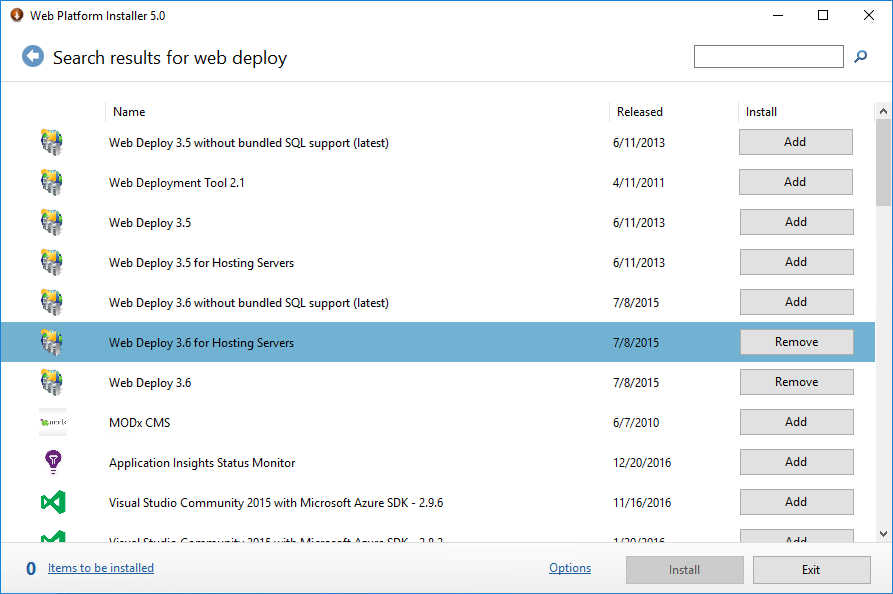
Web Deploy is not part of IIS (or the .NET platform), and it is not found in the Windows Server features. It can be installed via the Microsoft Web Platform Installer.
- Download the Web Platform installer from link above
- Under Products, search for “web deploy”
- Find and add Web Deploy 3.6 for Hosting Servers and Web Deploy 3.6 (or a newer version), click Add and then Install
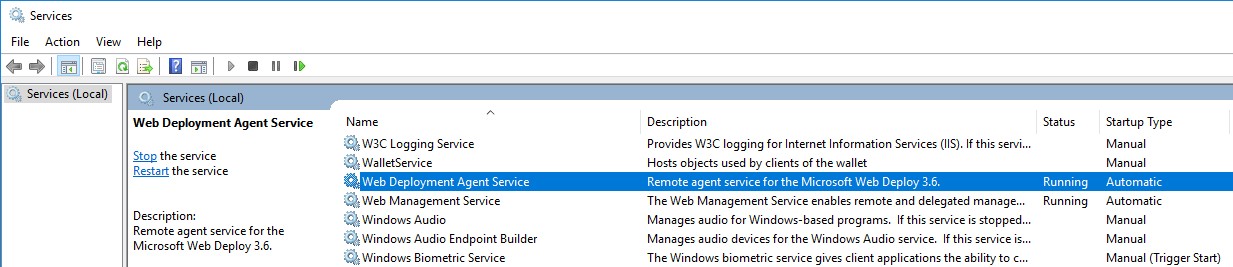
Note: If the installation of Web Deploy fails, it means that one or more features for IIS are missing. In this case you need to go back to the Server Manager > Add Roles and Features Wizard page, add all the necessary Web Server (IIS) features, and reinstall Web Deploy (you may need to uninstall it first). - Once the installation is done, launch Services and verify that Web Deployment Agent Services is running (and has the Startup Type set to “Automatic”)
ASP and .NET Framework
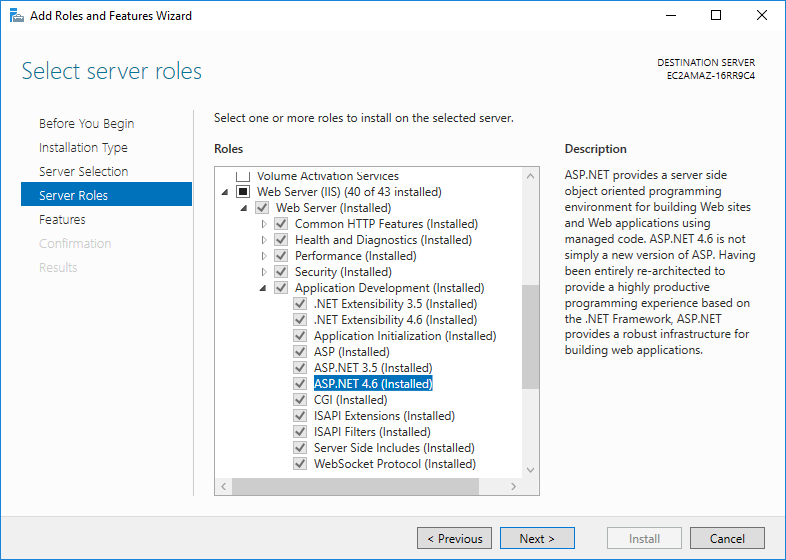
Make sure that ASP.NET and the .NET framework are installed in the Windows Server.
- Launch Server Manager and select Manage > Add Roles and Feature
- In the Add Roles and Features Wizard, Server Roles page, find “Web Server (IIS)”, select the appropriate ASP.NET and .NET Extensibility versions, and install them
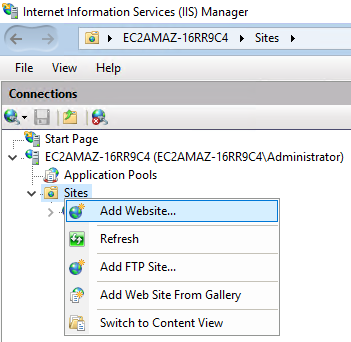
Create a Web Site in IIS
- In your Windows Server machine, launch Internet Information Services (IIS) Manager
- Right-click Sites and select Add Website…
- Enter the web site information (you can use your domain as site name)
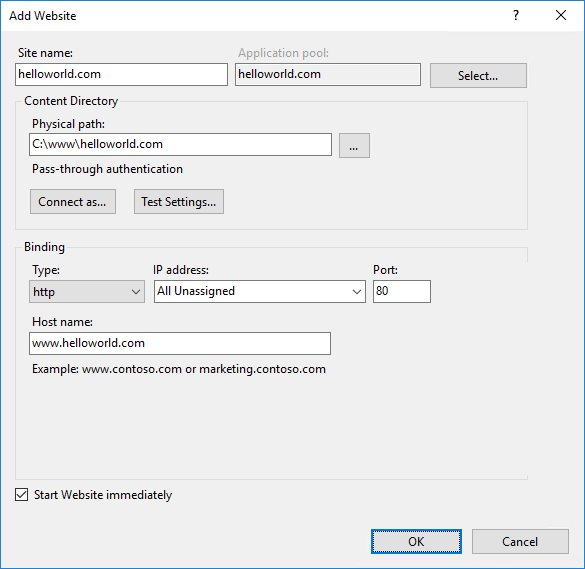
- Click Connect As… and specify the user (using “Specific user” seems to be easier to set up than “Application user”)

- Click OK to save the user. Before closing the Add Website screen, click Test Settings… to make sure that the connection works as expected
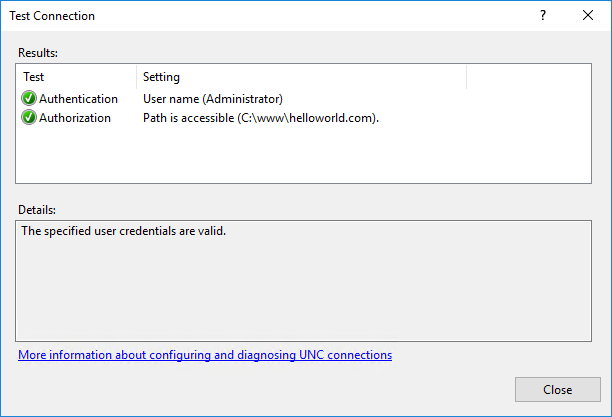
- Click Close to exit the Test Connection screen, and then click OK to close and save the new web site
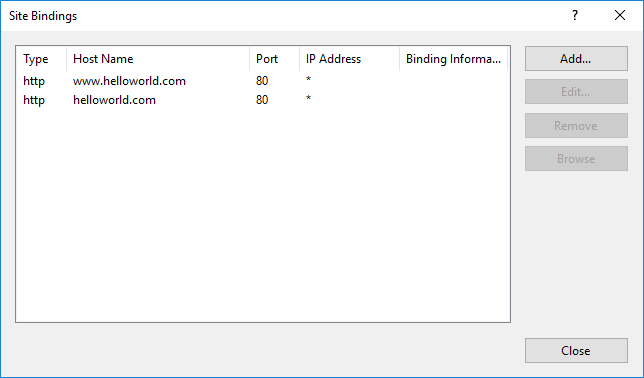
- To make sure that the web site is accessed whether or not you specify “www”, have both options in the Site Bindings
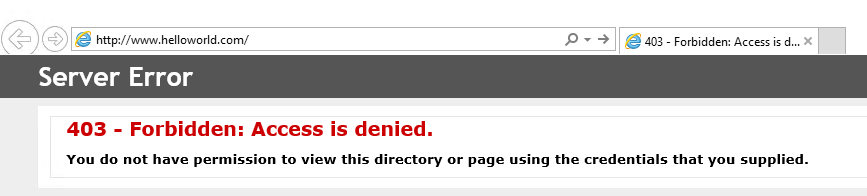
- The site is now up and running. If you browse it, though, you will receive the following error message (this is because we did not deploy the actual web application)
Deploy Web Application to IIS
With the web site up and running on IIS, and with Web Deploy installed in your Windows Server, you can now deploy your web application.
- Open your web application project in Visual Studio
- Right-click on the project name and select the option Publish…
- This will open the Publishing Web screen. The first time you deploy a web app, you need to create a publish profile.
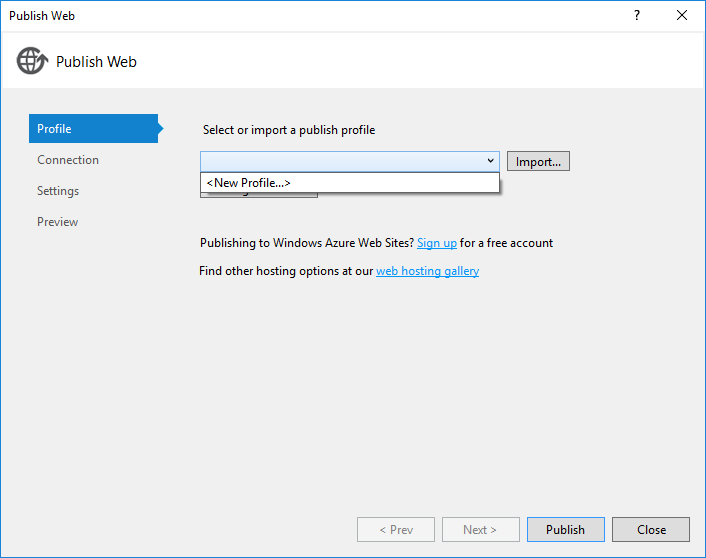
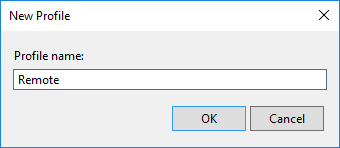
- Select the option <New Profile…> and enter the profile name (this can be anything). Then click OK
- In the next screen (Connection), select “Web Deploy” as Publish Method, and enter the remote information. Click Validate Connection to make sure that the tool successfully connects to the remote server (if you see a warning about the security certificate, simply acknowledge it and click Accept)

- Note: The server name should be the Public DNS (IPv4) from the EC2 instance details on AWS. The user name should be the same as the one specified upon creating the web site on IIS.
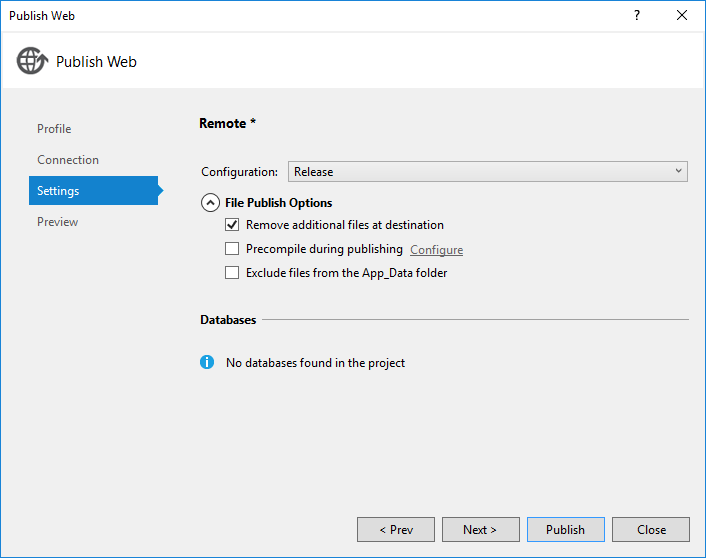
- In the next screen (Settings), select “Release” as Configuration mode, and check “Remove additional files at destination” to make sure that the entire web application folder is updated on deployment. Click Publish
- If everything is set up correctly, the deployment tool should launch your web site on your default web browser
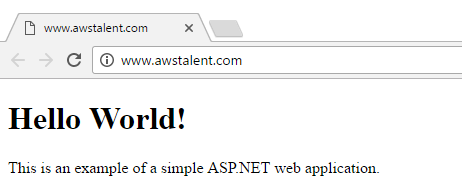
Your web application is now deployed and publicly available.
0 Comments Leave a comment
Comments are closed.