ASP.NET Core is the next generation, open source, framework for web applications. It is designed to run on .NET Core, a cross-platform and open-source managed software framework similar to .NET Framework (ASP.NET Core web applications can also run .NET Framework). In contrast with .NET Framework, web applications built on .NET Core are cross platforms, and can run on (virtually) any operating system.
Visual Studio 2015
.NET Core is available in Visual Studio 2015 (and newer). Upon creating a new Web project in Visual Studio, you are provided with the following options:
- ASP.NET Web Application (.NET Framework): classic (legacy) ASP.NET MVC project that uses .NET Framework
- ASP.NET Core Web Application (.NET Core): new ASP.NET Core MVC application that uses the next generation .NET Core runtime
- ASP.NET Core Web Application (.NET Framework): new ASP.NET Core MVC application that uses the classic .NET Framework
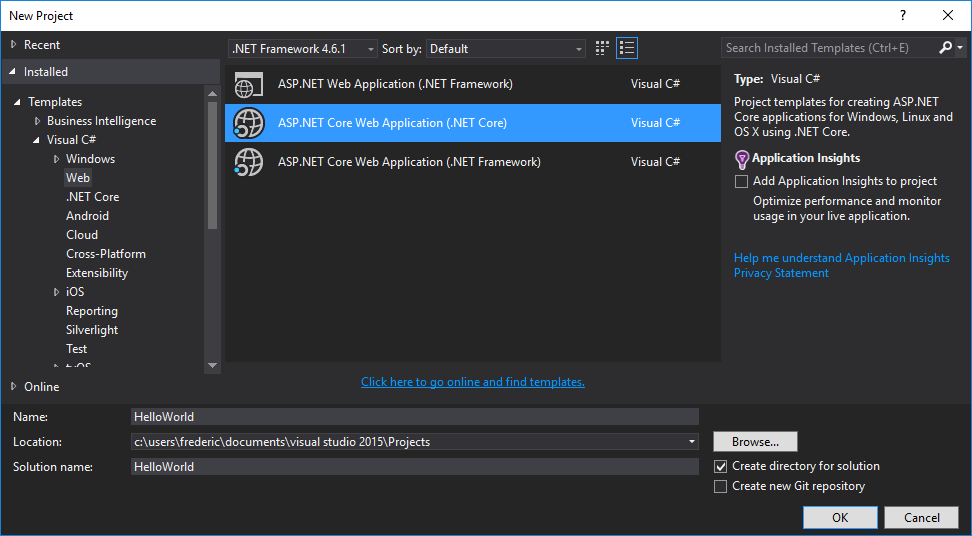
In this tutorial we will focus on the second option: ASP.NET Core Web Application (.NET Core), so create a new project (feel free to use a Web Application template in the next window, just to have a sample app).
- In the newly created project, include the dependency on the
Microsoft.AspNetCore.Server.IISIntegrationpackage in the application dependencies (project.jsonfile):

- Still in the
project.jsonfile, make sure thepublishOptionsobject includes**/*.cshtml(otherwise you will get anInvalidOperationExceptionsaying that the view was not found):
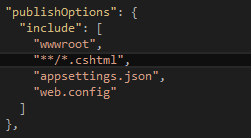
Note: You may also includeappsettings.json, if you are going to use it in your web application. - Include the call
.UseIISIntegration()to theWebHostBuilder:
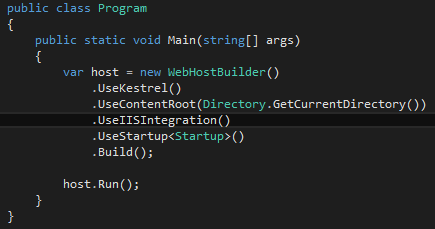
Note: Calling.UseIISIntegration()does not affect code portability.
Internet Information Services (IIS)
There are also few things that need to be set up in your web server in order to deploy an ASP.NET Core web application on IIS.
- Unless you plan to hosting a self-contained web application (which will include, on top of your application, the .NET Core runtime libraries and all its dependencies), you will need to install the .NET Core Windows Server Hosting bundle on the server. Keep in mind that a self-contained web application will make it possible to run the application like a normal executable application (so no web server or external dependencies are required), but the application itself will be 10x bigger.
- After you install .NET Core, run the following commands:
net stop was /y
net start w3svc
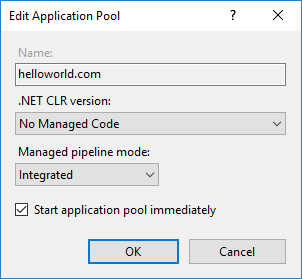
Note: Without .NET Core on your server, you will get a 502 – Web server received an invalid response while acting as a gateway or proxy server error message when you access your web application from a web browser. - The web site can be set up on IIS normally, like if you were to deploy a classic ASP.NET MVC application. The only difference is the .NET CLR version in the Application Pool, which can be set to “No Managed Code” (remember, we are not using the classic .NET Framework, but instead the .NET Core runtime):
Publishing Using Web Deploy
Publishing an ASP.NET Core MVC web application using web deploy is exactly the same as a classic ASP.NET MVC (or Web Forms) application. Follow these instructions for more details.
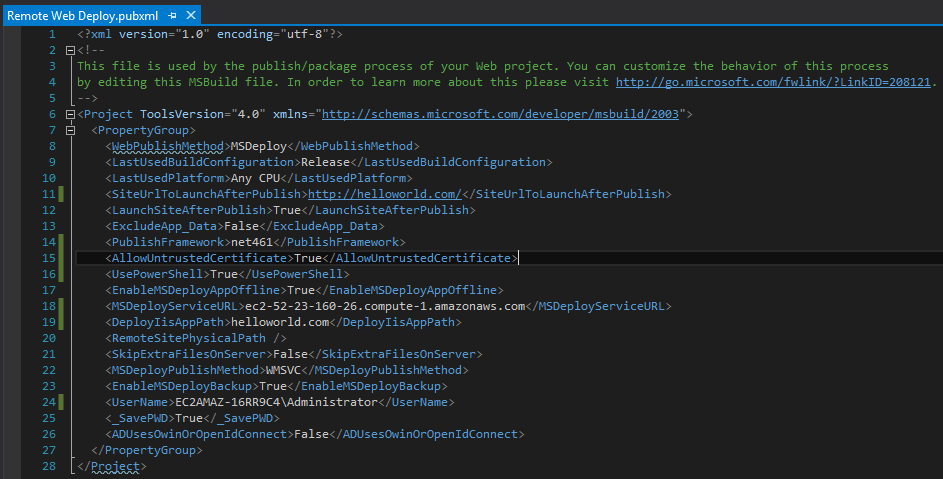
You may encounter in a SSL/TSL error (ERROR_CERTIFICATE_VALIDATION_FAILED): this usually happens when the server uses a self-issued certificate. If that happens, simply set to accepts untrusted certificates in your publishing XML file:
<AllowUntrustedCertificate>True</AllowUntrustedCertificate>
If everything is set up correctly, the deployment tool should launch your web site on your default web browser (note that this is the Web Application template):

Enable Error Messaging
During the development of the application you may find it useful to see full and descriptive error messages directly in the browser.
- In the
Startupclass,Configure()method, addapp.UseDeveloperExceptionPage();in order to see the exceptions thrown by the application

- In the
web.configfile, add<httpErrors existingResponse="PassThrough" />to see error messages from the server, that would otherwise be hidden by a generic 500 – Internal server error.

Note: In production you may want to disable them all.
0 Comments Leave a comment
Comments are closed.