This article explains how to launch a Microsoft Windows AWS EC2 instance, deploy a WISA (Windows, IIS, SQL Server, and ASP.NET) stack with a default website, and map the server with a domain registered with GoDaddy.
Create an EC2 Windows Server Instance
- Open the AWS EC2 Management Console
- Click Launch Instance

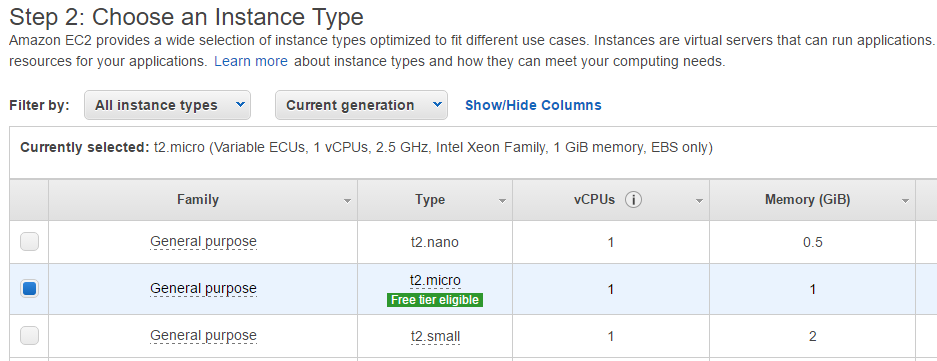
- Select a Microsoft Windows Server instance (you may want to start with one that is “free tier eligible”)

- Choose an instance type
- Since we are launching a simple instance, you may skip all the steps and click Review and Launch

- In the Review Instance Launch page click Launch
- Select an existing key pair or create a new key pair
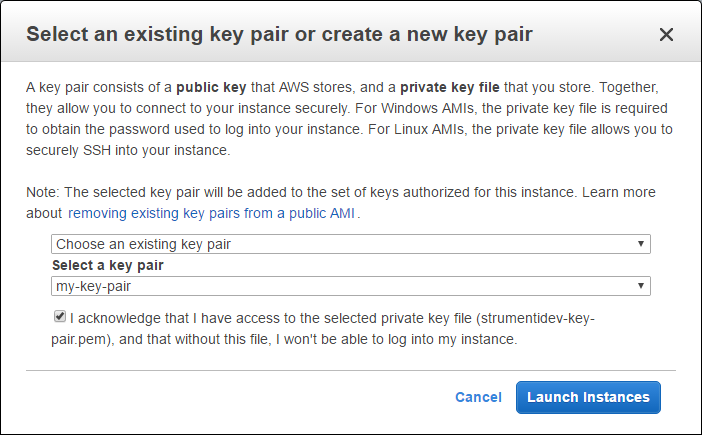
Note: If you create a new key pair, AWS will generate a new private key (.pem file) to be downloaded to your computer. This file is essential in order to connect to the instance. If you lose the file, you may never be able to connect to that instance and you may need to terminate it a recreate a new one. - Click Launch Instances
- Click View Instances to open the EC2 Management Console

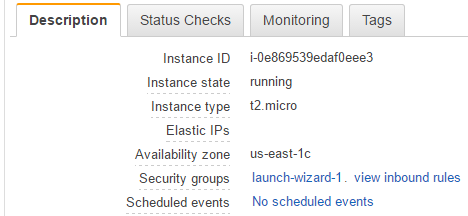
Note: The instance may take a few minutes to start up. You can give the instance a name (for example, the type of machine). - Once the instance is up and running, you have to set up inbound rules in order to make it publicly available. In the Description tab, click the security group that was automatically generate during the creation of the instance.
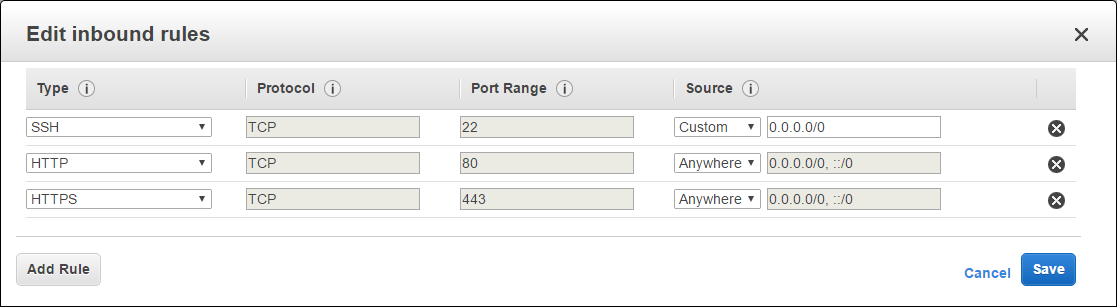
Note: You may specify the security group and inbound rules before launching the instance. - In the Inbound tab, click Edit to add new rules
- You should have an SSH rule already create by default (this allows you to connect via the Secure Shell protocol). Add a rule for HTTP and HTTPS, both with Source set to “Anywhere” (or “0.0.0.0/0” and “::/0”)
- The instance is now publicly accessible. The public IP address can be found in the EC2 Management Console in the Description tab
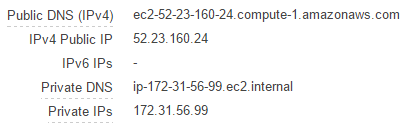
Note: Public IPv4 addresses are reallocated each time you stop or restart an instance. To make the IP address persistent, use Elastic IPs to allocate a static address and associate it with your EC2 instance.
Connect
You can connect to a Windows Server machine using the Remote Desktop Connect.
- In the EC2 Management Console, click Connect
- In the Connect To Your Instance popup, click Download Remote Desktop File to download the RDP file, already preconfigured for your EC2 instance.
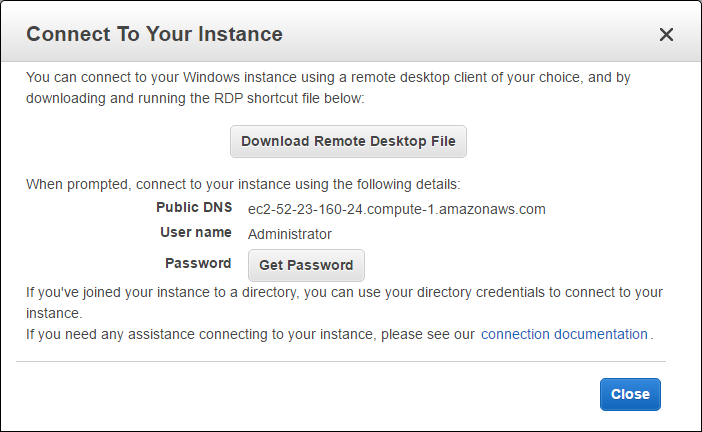
- In the same popup, click Get Password to obtain the authentication password.
- Load your private key and click Decrypt Password. The password will then be visible in your screen.

- Launch the RDP file and use the password to authenticate the access.

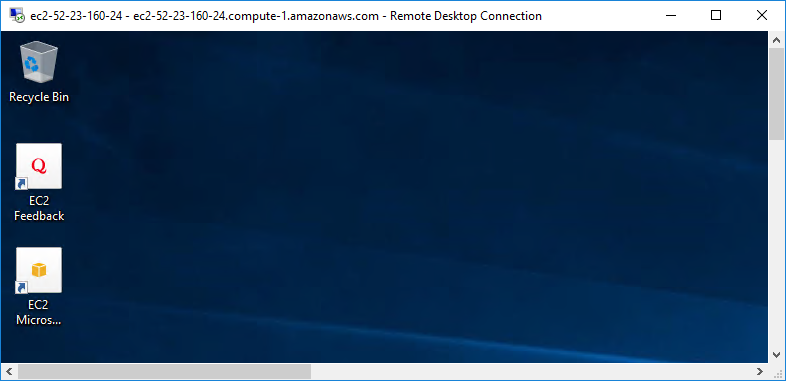
- You are now connected to your Windows Server machine.
Internet Information Services (IIS)
Internet Information Services (IIS) is an extensible web server created by Microsoft and available in Windows machines. IIS may or may not be enabled by default in the Windows Server EC2 instance.
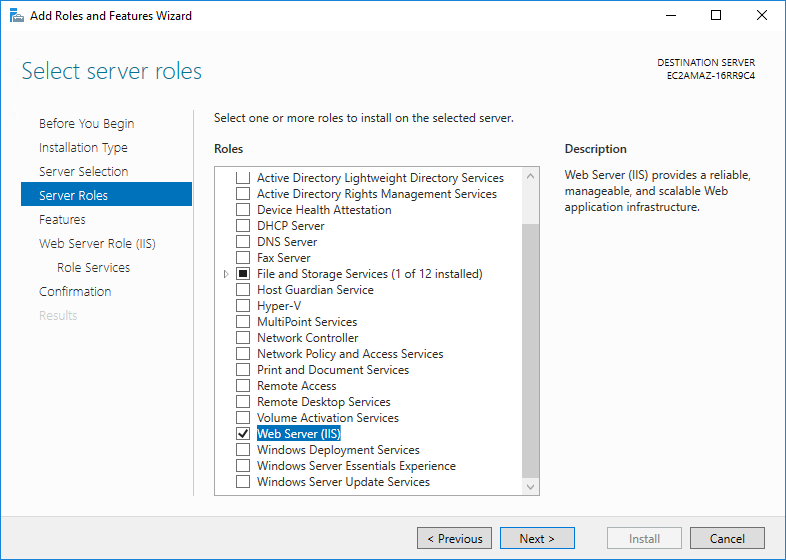
- In order to enable IIS, launch Server Manager and select Manage > Add Roles and Feature

- In the Add Roles and Features Wizard, Server Roles page, find and check “Web Server (IIS)”
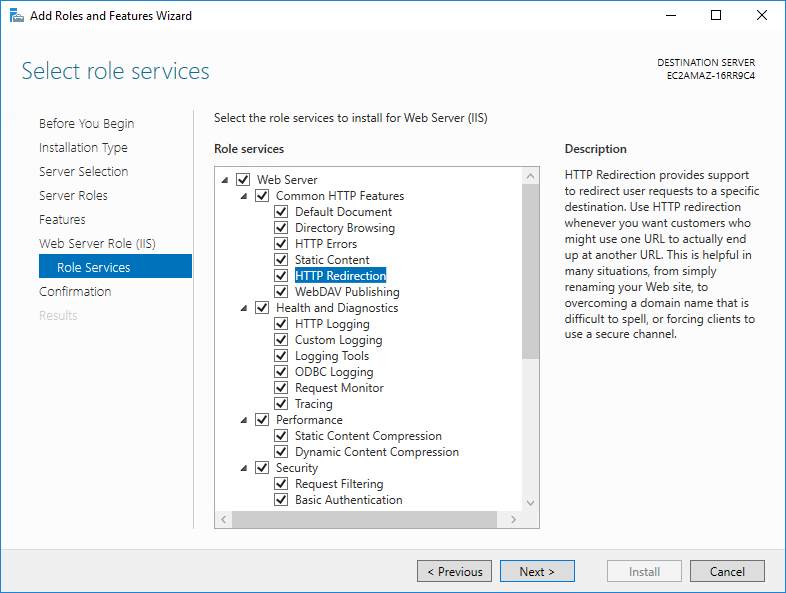
- In the Roles Services for Web Server Role (IIS), check the desired options to be include in the installation
- Confirm the installation
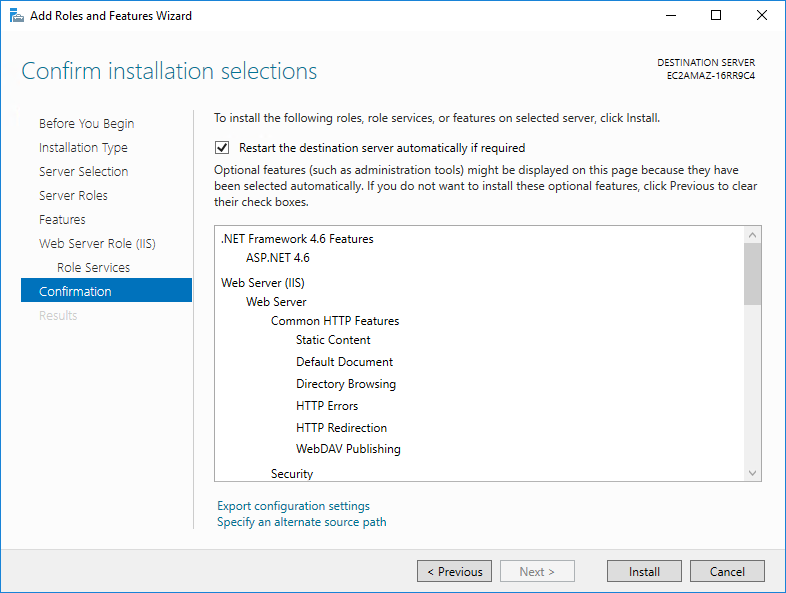
Note: The installation may take several minutes. - Once the installation is completed, you should be able to find the Internet Information Services (IIS) Manager in the Administrative Tools

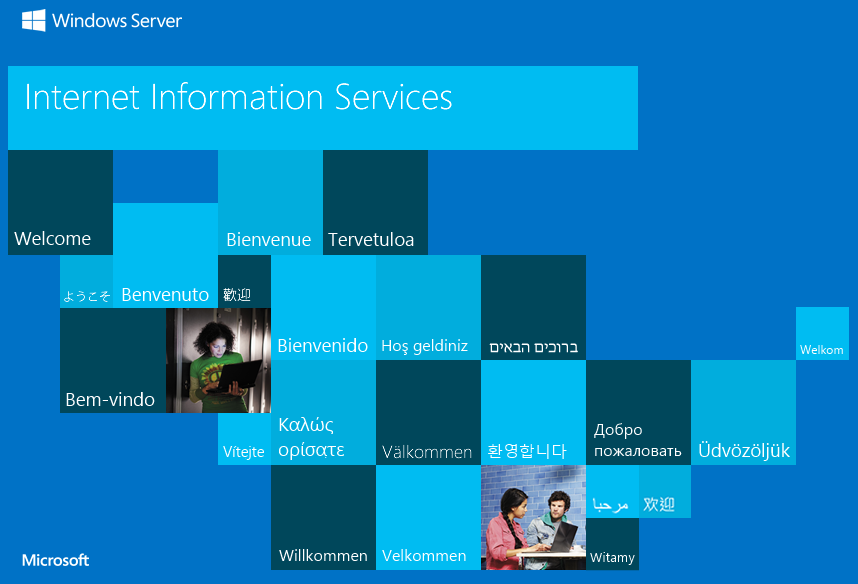
- If everything is installed correctly, you should be able to enter the IP address of your EC2 instance in any web browser, and see the IIS default page
Connect EC2 Instance to GoDaddy Domain
Follow these instructions to connect your EC2 instance to a GoDaddy domain. Once mapped, you should be reaching the same IIS default from either the public IP address or your domain.
ASP.NET Web Site
Follow this tutorial to create a simple “Hello World” ASP.NET web site and deploy it to IIS.
0 Comments Leave a comment
Comments are closed.